Mastering Toronto’s PATH is less about memorizing a map and more about understanding it as the central artery of the city’s entire mobility ecosystem.
- The underground network is a strategic tool designed to connect walking, biking, and public transit into a single, all-weather strategy.
- Your key decision points are the surface-to-subterranean transitions, which allow you to bypass weather and traffic.
Recommendation: Use the PATH’s color-coded system not just for direction, but to strategically link your journey between subway stations, street-level attractions, and your final destination.
The biting wind whips off Lake Ontario, and the thought of crossing downtown Toronto feels like an arctic expedition. For any seasoned resident or well-prepared visitor, the immediate solution is to dive underground into the PATH. The common advice is simple: “follow the colored signs.” Most guides will show you a static map or list the connected buildings, treating the PATH as a self-contained maze. Similarly, urban mobility is often viewed in silos: you either take the TTC, walk, or grab a bike.
But what if the key to truly conquering Toronto’s downtown core wasn’t just surviving the cold, but mastering the city’s entire, multi-layered mobility ecosystem? What if the PATH is not a confusing labyrinth to be solved, but a strategic, all-weather artery that connects every other form of transport? This perspective shifts the challenge from simply not getting lost to moving with intelligence and efficiency. The real skill lies in mastering the surface-to-subterranean transitions, knowing when to descend into the climate-controlled corridors and when to emerge for a final-leg bike ride or a stroll through a pedestrian-only district.
This guide offers a new approach. We will deconstruct Toronto’s urban mobility, layer by layer. We’ll analyze the economics of bike sharing, the realities of walking long distances, the strict rules governing new transport modes, and the essential gear for a Canadian winter. Ultimately, we will explore the PATH not just as a walkway, but as the central nervous system for your downtown journey, especially when the temperature plummets.
To navigate this complex urban environment, this article breaks down each component of your journey. The following sections provide detailed insights and practical tips, from the cost of your bike ride to the safest way to walk on an icy January morning, all designed to help you move through Toronto like a local.
Summary: Mastering Toronto’s Multi-Layered Urban Movement
- Bike share: why do trips over 30 minutes cost you a fortune?
- Shoes and distances: is it realistic to visit everything on foot in Toronto?
- E-scooters and pedestrians: what are the current rules on sidewalks?
- Urban crampons: are they necessary for walking in the city in January?
- Bike on the bus: at what times are you allowed to board with your bicycle?
- How to safely practice kayaking on Lake Ontario for beginners?
- Why is the Distillery District a must-see for design lovers?
- Underground PATH: the best guided tour option when it’s -20°C?
Bike share: why do trips over 30 minutes cost you a fortune?
Bike Share Toronto seems like a cost-effective and nimble way to navigate the city, and for short trips, it is. The system is designed for quick, point-to-point journeys, with pricing models that heavily favor rides under 30 minutes. However, many users get a surprise when they see their credit card statement after a leisurely ride along the waterfront. The financial trap lies in the overage fees for classic bikes and the per-minute pricing structure for e-bikes.
For annual members, the first 30 minutes of a classic bike ride are included. After that, the meter starts running. According to Bike Share Toronto’s official pricing, you’re charged $0.12 for every additional minute. This may not sound like much, but a 45-minute trip will cost you an extra $1.80. A one-hour ride adds up to $3.60 on top of any pass you may have. E-bikes, while great for hills, are even more expensive, charging a per-minute fee from the moment you unlock them.
When you compare this to other transit options, the value proposition can quickly diminish for longer journeys. A single TTC fare gives you a two-hour window to travel anywhere on the system, making it a more predictable and often cheaper choice for trips exceeding half an hour. Understanding this 30-minute threshold is crucial for strategically integrating bike share into your urban mobility plan without unexpected costs.
This table breaks down the cost of a typical 45-minute journey, highlighting how quickly overage fees can accumulate compared to a standard transit fare.
| Transport Option | 30-min Trip Cost | 45-min Trip Cost | Notes |
|---|---|---|---|
| Bike Share Classic (Annual Member) | $0 | $1.80 | $0.12/min overage after 30 min |
| Bike Share E-bike (Annual Member) | $3.00 | $4.50 | $0.10/min from start |
| TTC Single Fare | $3.35 | $3.35 | Unlimited time within 2 hours |
Ultimately, Bike Share Toronto is an excellent tool for the “last mile” of a journey or for short hops between neighborhoods, but it’s rarely the most economical choice for extensive sightseeing or cross-city treks.
Shoes and distances: is it realistic to visit everything on foot in Toronto?
Toronto’s downtown core feels compact on a map, leading many to believe they can conquer its key attractions on foot. While the city is pedestrian-friendly, with vibrant neighborhoods like Kensington Market and Queen West begging to be explored at a walking pace, the reality is that Toronto is a city of significant scale. Walking from the CN Tower to the Distillery District, for example, is a 3-kilometer trek that takes over 30 minutes without stopping. Attempting to “see everything” on foot in a single day is an ambitious goal that can quickly lead to exhaustion, especially in the fluctuating Canadian weather.
A more realistic approach is to think of walking in terms of “neighborhood clusters.” You can comfortably explore the entire Financial District and Entertainment District on foot, then use the TTC or a short bike ride to hop to another cluster like Yorkville or the Annex. This strategy respects the city’s geography and conserves your energy. The choice of footwear is paramount. In summer, comfortable sneakers are sufficient. In winter, however, the challenge intensifies. Sidewalks can be a treacherous mix of clear pavement, packed snow, and the dreaded black ice. Waterproof, insulated boots with excellent grip are not a suggestion; they are a necessity for both comfort and safety.
Winter walking requires a heightened sense of awareness and a different gait—shorter, more deliberate steps can prevent a fall. The City of Toronto itself provides guidance for navigating sidewalks safely during its harsh winters, emphasizing vigilance and proper preparation.
Your Action Plan: Winter Walking Safety in Toronto
- Property Owners: Clear snow and ice from your sidewalks within 12 hours of a storm’s end to ensure pedestrian safety.
- Situational Awareness: Pay full attention to your surroundings; avoid texting or other distractions while walking on potentially icy surfaces.
- Black Ice Protocol: If you encounter a patch of black ice, try to steer straight through it without braking or making sudden turns to avoid skidding.
- Path Selection: When cycling or walking, avoid riding over large snow banks and stick to wet pavement whenever possible, as it offers better traction.
- Time and Distance: Give yourself extra time for your journey and maintain a greater distance from vehicles and other pedestrians to navigate slippery conditions safely.
By combining strategic walking within neighborhoods with other forms of transit for longer distances, you can enjoy the best of Toronto’s pedestrian experience without underestimating its size.
E-scooters and pedestrians: what are the current rules on sidewalks?
As you navigate Toronto’s sidewalks, you’ll see a variety of personal mobility devices, but one is conspicuously absent from legal use: the personal e-scooter. While other cities have embraced e-scooter sharing programs, Toronto has maintained a firm stance against them on public property. The rule is simple and absolute: you cannot legally ride a personal e-scooter on sidewalks, roads, or in parks.
This decision is rooted in significant safety concerns for pedestrians, particularly for seniors and people with disabilities. The quiet and fast nature of e-scooters creates a high risk of collisions on already crowded sidewalks. The City of Toronto’s transportation services have been unequivocal in their position, prioritizing pedestrian safety above the convenience that e-scooters might offer.

This official stance is a critical piece of information for anyone considering bringing their own device to the city. As the City of Toronto By-law clearly states, the restrictions are comprehensive and strictly enforced.
Personal e-scooters are illegal to operate on any public property.
– City of Toronto By-law, City of Toronto Transportation Services
This means that unlike bikes, which have dedicated lanes and clear rules for road use, e-scooters occupy a legal grey area where their only permissible space is private property. For visitors and residents, this translates to relying on other established modes of transport: walking, cycling, and the extensive TTC network. While the debate over a future e-scooter pilot program continues, the current legal framework is not ambiguous. Ignoring these rules can result in fines and the confiscation of the device. Therefore, when planning your journey through Toronto, e-scooters should not be considered a viable option for navigating public spaces.
Focusing on legal and safe alternatives like bike share or simply walking will ensure your exploration of the city is both enjoyable and compliant with local regulations.
Urban crampons: are they necessary for walking in the city in January?
The question of whether to wear urban crampons—also known as ice grips or cleats that you pull over your boots—may seem like overkill for a city environment. However, anyone who has navigated Toronto in January knows that sidewalks can become slick, dangerous sheets of ice. A light dusting of snow can easily hide a treacherous surface, leading to slips and falls that are more than just an inconvenience. In fact, these incidents represent a significant public health issue; winter injuries cost Ontario’s healthcare system an estimated $4 million annually.
While high-quality winter boots with good tread are a baseline requirement, they often fail on smooth, sheer ice. This is where urban crampons become an invaluable tool. They are not the heavy-duty spikes used for mountaineering but are typically made of flexible rubber with small metal studs or coils that provide critical traction on ice. They are lightweight, can be easily slipped on or off as you transition from icy streets to indoor spaces like the PATH or a subway station, and represent a small investment for a massive gain in personal safety and confidence.
The need for better footwear safety has even spurred local scientific innovation, demonstrating the seriousness of the problem in a Canadian urban context.
Case Study: KITE Research Institute’s Winter Footwear Testing
The KITE Research Institute, part of the Toronto Rehabilitation Institute, took a scientific approach to this problem. They developed the Maximum Achievable Angle (MAA) test inside their state-of-the-art WinterLab, which features a floor that can be coated in ice and tilted up to 15° to simulate icy slopes. Their rigorous testing revealed that the majority of commercially available winter boots provided very poor grip on ice. This research led to the creation of the ratemytreads.com website, a public resource that helps consumers choose safer winter footwear based on objective, scientific performance data.
So, are urban crampons necessary? For a short walk on a well-salted main street, perhaps not. But for anyone who plans to do extensive walking, commute daily on foot, or navigate quieter residential streets in the depths of a Toronto winter, they are a wise and highly recommended piece of safety equipment.
Bike on the bus: at what times are you allowed to board with your bicycle?
Integrating your personal bicycle with Toronto’s public transit system, the TTC, is a powerful strategy for extending your range and conquering the city’s notorious hills. All TTC buses are equipped with front-mounted bike racks, making it possible to combine a bus ride with a bike journey. However, this flexibility comes with a set of rules and limitations that are crucial to understand to avoid being left at the curb.
The primary rule for buses is simple: if the rack has space, you can use it. Each rack can hold two bicycles, and it operates on a first-come, first-served basis. There are no time-of-day restrictions for bikes on buses, unlike the subway system. This makes buses a reliable connector throughout the day. However, it’s your responsibility to load and unload your own bike, a process that is quick once you’re familiar with it but can be intimidating the first time. It’s wise to review the instructions on the TTC website or watch a tutorial video before your first attempt.

The rules for the subway are different and more restrictive. You are not allowed to bring your bicycle on subway trains during weekday rush hours, which are typically from 6:30 AM to 10:00 AM and from 3:30 PM to 7:00 PM. Outside of these peak times, as well as all day on weekends and statutory holidays, you are welcome to bring your bike into the subway cars. This restriction is essential for managing passenger crowding in the busiest parts of the day.
Understanding this dual system—unrestricted access on buses (space permitting) and time-based restrictions on subways—allows you to create a seamless, multi-modal commute. You can ride your bike to a bus stop, take the bus across a less bike-friendly part of town, and then continue your journey on two wheels.
This hybrid approach is the hallmark of an experienced urban navigator, turning the entire city into a more accessible and bikeable landscape.
How to safely practice kayaking on Lake Ontario for beginners?
While much of Toronto’s mobility focuses on land, the vast expanse of Lake Ontario offers a unique perspective on the city. For beginners eager to try kayaking, the open harbour with its ferry traffic, Porter Airlines flights, and unpredictable winds can be incredibly intimidating and genuinely hazardous. Safety must be the absolute priority, and that begins with choosing the right location.
The key is to seek out sheltered waters. Local experts and paddling instructors consistently point beginners away from the main harbour and toward the protected lagoons of the Toronto Islands. These tranquil waterways are shielded from the lake’s powerful waves and the heavy wake from commercial boat traffic, creating a much safer and more enjoyable environment for learning. You can rent kayaks directly on the islands, making it a convenient day trip. Here, you can practice your paddle strokes and build confidence while enjoying stunning views of the city skyline without the stress of navigating a busy shipping channel.
Even in calm waters, water safety protocols are non-negotiable. Always wear a properly fitted Personal Flotation Device (PFD). Check the weather forecast before you head out, as conditions on the lake can change with startling speed. It’s also critical to be aware of water temperature. Lake Ontario remains dangerously cold for much of the year, and falling in without a wetsuit or drysuit can lead to hypothermia very quickly. The Toronto and Region Conservation Authority (TRCA) regularly issues warnings about water safety, reminding people that conditions are always unpredictable. Though often focused on winter ice, their core message applies year-round: respect the water.
Beginners find the sheltered environment of the islands far more forgiving, as confirmed by those who teach there.
Local kayaking instructors recommend the sheltered Toronto Islands lagoons for beginners, contrasting them with the choppy, boat-heavy conditions of the main harbour where ferry traffic and Porter Airlines create challenging wake patterns.
– Local Instructor Testimony
By starting in the right location and adhering to basic safety measures, kayaking can be a fantastic way to experience a different side of Toronto’s unique urban geography.
Why is the Distillery District a must-see for design lovers?
In a city of glass towers and modern condos, the Distillery District stands apart as a masterclass in historical preservation and pedestrian-first urban design. For any lover of architecture, design, or urban planning, it’s not just a tourist attraction; it’s a living case study of successful adaptive reuse. The district has meticulously preserved the largest and best-preserved collection of Victorian Industrial architecture in North America, transforming what was once the Gooderham & Worts Distillery into a vibrant cultural hub.
The genius of the district lies in what it *doesn’t* have: cars. The area is entirely pedestrianized, with charming cobblestone streets that force you to slow down and appreciate your surroundings. Instead of being demolished, the old buildings have been given new life. This approach is a core principle of adaptive reuse architecture, where the character and history of a structure are celebrated rather than erased. The area’s design successfully weaves the past into the present in a way few places manage.
The transformation of the district is a testament to thoughtful urban planning that prioritizes human scale and experience over vehicular traffic.
Case Study: Adaptive Reuse Success in Toronto’s Distillery District
The Distillery District’s design showcases the power of adaptive reuse. The imposing Stone Distillery building, once the heart of the distilling operation, now houses restaurants and galleries. The former Tank Houses, where spirits were stored, have been converted into unique boutiques and artisan shops. Throughout the district, old industrial machinery is not hidden away but is integrated into the public space as sculptural art, serving as a constant reminder of the area’s rich history. This commitment to preserving the Victorian industrial character while creating a modern, functional space is what makes the Distillery District an internationally recognized success.
Walking through the Distillery District is a tactile experience. You can feel the rough texture of the old brick, see the intricate ironwork, and appreciate the thoughtful placement of public art and seating. It serves as a powerful counterpoint to the fast-paced, vehicle-dominated environments found elsewhere in the city.
It’s a must-see because it demonstrates that with vision, a city’s industrial past can become the foundation for its creative and cultural future.
Key takeaways
- The PATH is a strategic mobility connector, not just an underground tunnel, linking all forms of transit.
- Each mode of transport in Toronto (bike share, TTC, walking) has specific rules, costs, and seasonal challenges that must be understood.
- Winter safety is an active practice, requiring specific gear like urban crampons and heightened awareness on icy surfaces.
Underground PATH: the best guided tour option when it’s -20°C?
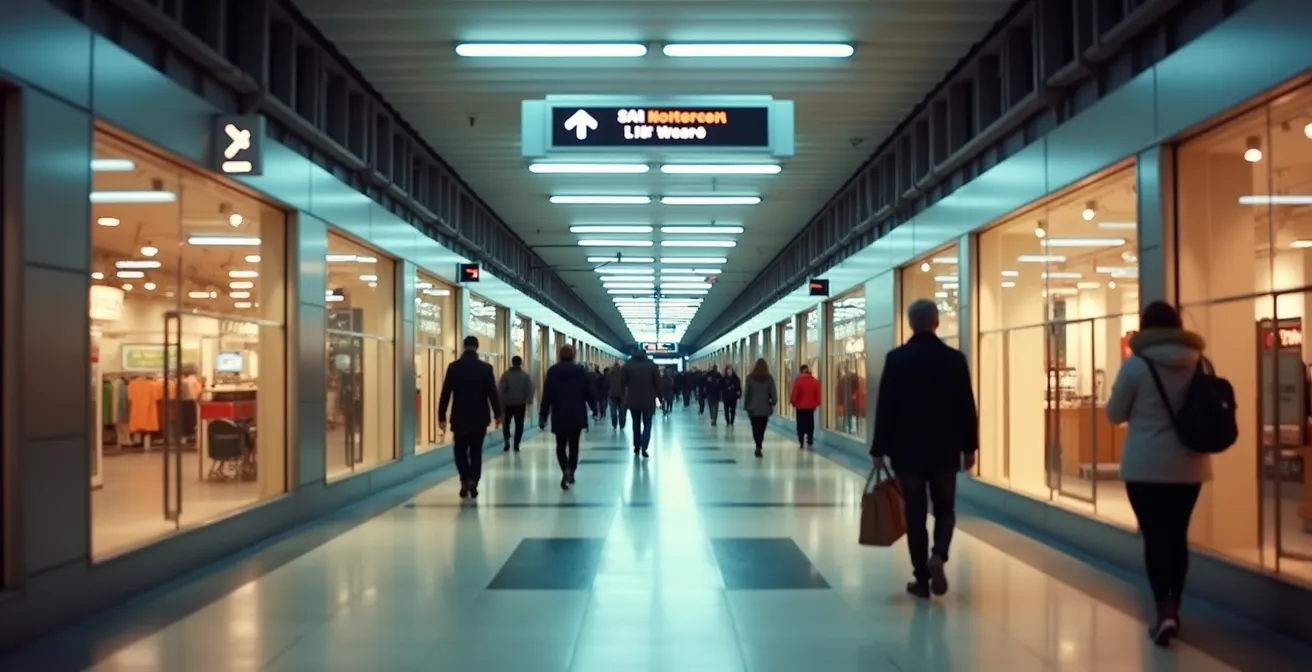
When the temperature in Toronto plunges to -20°C, the idea of a walking tour seems absurd. Yet, the city offers a unique solution: the PATH. This 30-kilometre network of underground pedestrian tunnels is far more than a simple collection of corridors; it’s a bustling, climate-controlled downtown ecosystem of its own. On a frigid day, it is unquestionably the most comfortable way to explore the heart of the city, connecting major attractions like the CN Tower, Scotiabank Arena, and the Eaton Centre without ever exposing you to the elements.
Navigating the PATH, however, requires a shift in thinking. You are no longer navigating by street names but by a system of colours and building connections. The key is the color-coded wayfinding system: Red (P) leads you south, Blue (A) north, Orange (T) west, and Yellow (H) east. The letters spell out “PATH.” Look for these signs on the ceiling at intersections. The system also relies on understanding “vertical mobility”—knowing that you might need to go up or down an escalator in a food court or office lobby to find the next connection. Six subway stations connect directly, making the PATH the ultimate link between surface-level attractions and the city’s transit backbone.
The economic and social significance of this network is immense. It’s not just a walkway; it’s a major commercial district. In fact, a study by the Toronto Financial District BIA found that the PATH’s 1,200 shops and restaurants generate approximately $1.7 billion in annual sales. This highlights its role as a vital piece of urban infrastructure, keeping the city’s economic heart beating even during the harshest weather. It is, in essence, a self-contained downtown, complete with services, shopping, and entertainment.
By understanding the logic of its colour-coded paths and its integration with public transit, you can transform the PATH from a potentially confusing maze into your greatest strategic advantage for all-weather urban exploration.
Frequently asked questions about How to navigate the underground PATH network without getting lost?
How do I navigate the PATH’s color-coded system?
Red indicates south, blue points north, yellow leads east, and orange points west. Look for the yellow circle with a black ‘P’ logo at entrances to identify access points.
Which subway stations connect directly to the PATH?
Six stations on the Yonge-University Line offer direct connections: Dundas, Queen, King, Union, St. Andrew, and Osgoode.
Can I access the PATH on weekends?
The PATH is open 24/7. However, be aware that some specific building access points may have limited hours, and many of the retail shops and services operate on reduced hours or are closed on weekends.