Successfully removing a load-bearing wall in a Toronto semi is a structural engineering project, not a design decision, and hinges entirely on a non-negotiable, safety-first process.
- The primary risk isn’t immediate collapse, but gradual sagging, cracking, and long-term structural failure caused by improper load redistribution.
- Working without a City of Toronto permit voids home insurance, exposes you to immense liability, and can erase, rather than add, property value.
Recommendation: Your first and only starting point is to engage a Professional Engineer (P.Eng) to create stamped drawings. Do not proceed with any contractor who suggests otherwise.
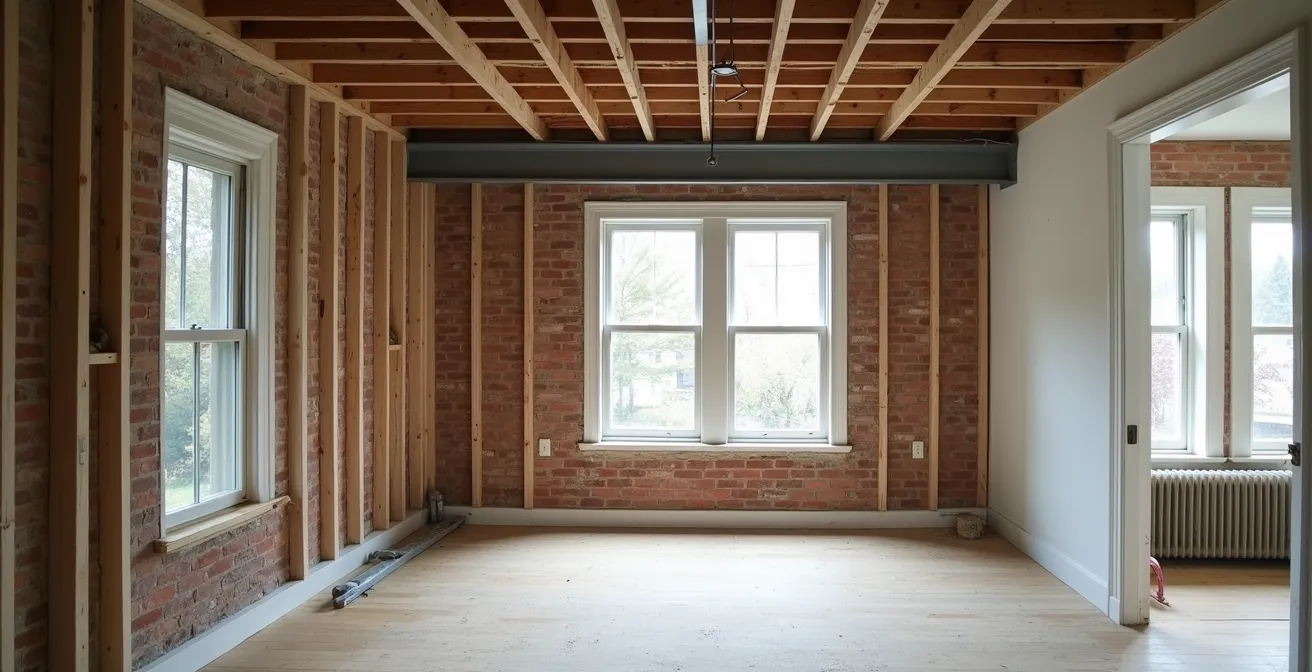
The dream is alluring: transforming the compartmentalized layout of a classic Toronto Victorian or Edwardian semi-detached into a bright, flowing open-concept space. For many homeowners, the biggest obstacle standing in the way is a central, load-bearing wall. The common advice often seems deceptively simple—get a contractor, put in a beam, and enjoy your new kitchen. This approach, however, dangerously overlooks a fundamental truth. Removing a structural wall is not a cosmetic update; it is major surgery on your home’s skeleton.
Many homeowners are unaware of the cascading risks involved. They worry about the obvious but miss the subtle, delayed consequences of a poorly executed project: a sagging second floor that appears two years later, persistent cracks in the drywall, or doors that no longer close properly. The real danger often lies not in the “what” of removing the wall, but in the “how” of transferring the immense weight it supports—a concept engineers call the load path. Every pound from your roof, snow, second floor, and furniture that once rested on that wall must be safely redirected down to the foundation.
This guide departs from simplistic advice. From the perspective of a structural engineer, we will not focus on design trends. Instead, we will dissect the critical, safety-obsessed, and regulatory-focused steps essential for success. We will explore why permits are non-negotiable, how to differentiate between beams, what happens when foundations aren’t considered, and how to ensure your significant investment adds legally recognized value instead of creating a hidden structural liability. This is your blueprint for doing it right, ensuring your home’s structural integrity for decades to come.
This comprehensive guide details the engineering and regulatory framework essential for safely removing a load-bearing wall in Toronto. The following sections break down each critical stage, from insurance implications to the final touches that secure your investment.
Summary: A Technical Guide to Load-Bearing Wall Removal in Toronto
- Why Removing a Wall Without a Permit Can Void Your Home Insurance?
- How to Tell if a Wall Is Load-Bearing Before Calling an Engineer?
- Steel Beam or LVL: Which Is Better for Spanning a Wide Open Kitchen?
- The Support Mistake That Causes Your Second Floor to Sag Years Later
- When to Relocate Ductwork That Is Hidden Inside the Wall You Want to Remove?
- The Foundation Mistake That Can Collapse Your Row House During Excavation
- Why a Legal Retrofit Increases Your Property Value by Over $50,000?
- Which White Paint Color Increases Resale Value for Toronto Condos?
Why Removing a Wall Without a Permit Can Void Your Home Insurance?
The decision to bypass the City of Toronto’s building permit process is often viewed as a way to save time and money. From a structural and financial risk perspective, it is the single most dangerous mistake a homeowner can make. The consequences extend far beyond a potential fine from the city. Unpermitted structural work can give your insurance provider grounds to deny a claim for any subsequent damage, even if it seems unrelated. Shockingly, Canadian Underwriter research reveals that only 6% of homeowners looked into their policy before starting a renovation, leaving them critically exposed.
Imagine a scenario: a year after your unpermitted wall removal, a plumbing leak on the second floor causes significant water damage. During the assessment, the insurance adjuster discovers the unsanctioned structural modification. As confirmed by real estate experts, homeowners insurance often excludes coverage for damages stemming from unpermitted work. The insurer can argue that the structural changes, uninspected and unapproved, may have contributed to the failure or altered the home’s risk profile. Your claim for water damage could be denied entirely, leaving you responsible for tens of thousands of dollars in repairs.
A building permit is not bureaucratic red tape; it is a critical part of your risk management strategy. It triggers independent, third-party inspections by the city, verifying that the work complies with the Ontario Building Code (OBC) and matches the engineer’s approved plans. This creates an official record that your renovation was performed to a legal standard of safety, protecting you, future owners, and your insurance eligibility.
Your Action Plan: Protecting Your Insurance Coverage
- Pre-emptive Contact: Before any demolition begins, notify your insurance company of your planned structural renovation. They will advise on any necessary policy riders or coverage adjustments during construction.
- Obtain Legal Permits: Work with your engineer or designer to submit all necessary drawings and applications to the City of Toronto to secure a building permit.
- Mandatory Inspections: Ensure your contractor schedules and passes all required municipal inspections at key project milestones (e.g., after framing, before closing walls).
- Meticulous Record-Keeping: Maintain a complete file containing all stamped engineering drawings, permit placards, and passed inspection reports.
- Close the Loop: Once the project is complete and the final inspection is passed, submit the closed permit documentation to your insurer to prove the work was completed to code.
How to Tell if a Wall Is Load-Bearing Before Calling an Engineer?
While it is tempting for homeowners to perform their own initial assessment, it is critical to understand that only a qualified structural engineer can definitively determine if a wall is load-bearing. A DIY diagnosis is a high-stakes gamble. However, understanding what an engineer looks for can help you appreciate the complexity of the assessment and the absolute necessity of professional involvement. An engineer doesn’t just look at one clue; they trace the entire load path from the roof down to the footings, analyzing how forces are distributed throughout the home’s structure.
This forensic investigation involves several steps. First, we conduct a site inspection, taking precise measurements. A key indicator is joist direction; if the floor or ceiling joists run perpendicular to a wall and rest on top of it, the wall is almost certainly carrying a load. We then search for clues in the attic and basement of your Toronto semi. Beams, support posts, and doubled-up joists directly above or below a wall are tell-tale signs that it is part of the home’s primary support system. In older homes, these clues can be hidden by decades of previous renovations.
The image below shows a typical scenario in a Toronto basement, where floor joists rest on a central beam, which in turn transfers the load to support columns. Removing a wall above this beam without a proper plan would be catastrophic.
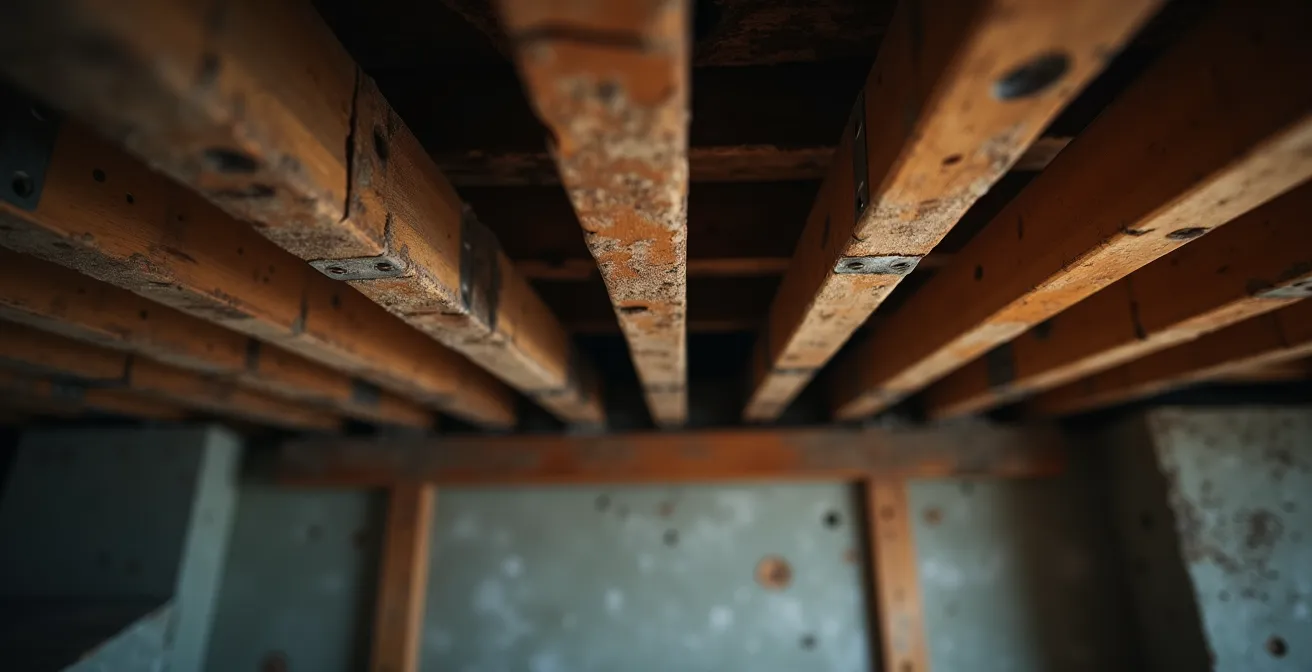
If available, we review the original as-built drawings. However, in a century-old home, these are often non-existent or inaccurate due to past, sometimes unpermitted, alterations. Therefore, a physical inspection is always the definitive source of truth. Misinterpreting any of these signs can lead to under-designing the replacement beam, resulting in future structural failures. This is why the engineer’s analysis is the unskippable first step of any safe renovation.
Steel Beam or LVL: Which Is Better for Spanning a Wide Open Kitchen?
Once an engineer confirms a wall is load-bearing, the next critical decision is selecting the right type of beam to carry the load. The two most common options for Toronto residential projects are Laminated Veneer Lumber (LVL) and a structural steel I-beam. While both can do the job, they have vastly different implications for ceiling height, installation logistics, cost, and ultimately, resale value. The choice is not just about strength; it is about achieving your desired aesthetic within the constraints of your home’s structure and your project budget.
An LVL beam is an engineered wood product created by bonding multiple thin layers of wood together. It’s strong, relatively lightweight, and can often be constructed on-site from smaller pieces, making it easier to get into a tight Toronto semi. However, to achieve the same strength as steel, an LVL beam must be much deeper. This depth typically requires the construction of a “bulkhead,” a section of dropped ceiling that hides the beam, compromising the perfectly flat, open-concept look.
A steel I-beam, by contrast, offers superior strength in a much slimmer profile. This allows it to be tucked tightly against the ceiling joists, creating a completely flush, seamless ceiling—a highly desirable feature in modern renovations. The trade-off is higher material cost and significantly more complex installation, which may require a crane, temporary street permits, and a crew with specialized experience in steel erection. As Toronto renovation blogger Soheila Hakimi of “Is That Soh” discovered during her project, specialized expertise is crucial. She notes that while many contractors are familiar with LVL, steel is a different challenge:
We needed a Toronto contractor with steel beam experience and know how. With over 15 years in the industry Raouf has been leading his team at Dynamic Design and Construction through numerous Toronto home renovations of varying magnitudes. He has restored century homes in Rosedale, built houses from the ground up, and has plenty of experiences removing load bearing walls and installing structural steel beams…
– Soheila Hakimi, Is That Soh
The following table, based on guidance for Toronto homeowners, breaks down the key factors to consider in consultation with your engineer and contractor.
| Factor | Steel Beam | LVL Beam |
|---|---|---|
| Profile Height | Slimmer (better for ceiling height) | Deeper (requires bulkhead) |
| Installation Logistics | May require crane & street permits | Can be brought through window |
| Typical Cost | Higher initial cost | More budget-friendly |
| Span Capability | Better for long spans (20ft+) | Good for typical spans |
| Resale Impact | Flat ceiling adds value | Bulkhead may reduce appeal |
The Support Mistake That Causes Your Second Floor to Sag Years Later
One of the most insidious and costly mistakes in a load-bearing wall removal is underestimating the phenomenon of beam deflection and long-term creep. A successful project isn’t just about preventing immediate collapse; it’s about ensuring the new support system doesn’t slowly sag over months and years under the constant, immense pressure from the floors above. This gradual sagging, or deflection, is what leads to tell-tale signs of structural distress long after the contractors have left: hairline cracks appearing at the corners of new doorways, doors that begin to stick in their frames, and a noticeable dip or “bounciness” in the second-floor hallway.
This was the exact situation faced by one Toronto homeowner during their renovation. They discovered that a previous owner had improperly removed a basement wall, leading to serious consequences. In their words, “Adam and I also noticed that there was some serious sagging in the floors. We suspected a load bearing wall was removed in the basement and if I ever hoped to install herringbone floors, this would need to be fixed.” The solution was not simple; it was a major structural intervention, including “installing structural beams, sistering joists, levelling floors, adding several new footings and steel posts in the basement.” This is a perfect illustration of how a single support mistake creates a cascade of expensive problems.
An engineer’s calculations are designed to prevent this. We don’t just design a beam that is “strong enough”; we design for stiffness. The Ontario Building Code specifies strict limits on how much a beam is allowed to deflect under its maximum potential load. This ensures the floor above remains flat and stable. The mistake often happens when a contractor, working without an engineer, selects a beam based on a simple span table without considering all the specific loads (floor, ceiling, walls, furniture, people, snow) it will carry over its lifetime. The beam might hold, but it will bend more than it should, and that is where the long-term problems begin. The cost of fixing a sagging floor and related drywall damage will always far exceed the initial cost of proper engineering.
When to Relocate Ductwork That Is Hidden Inside the Wall You Want to Remove?
In many older Toronto semi-detached homes, the very wall you want to remove serves a dual purpose: it’s not only structural but also a vertical chase for the home’s HVAC ductwork, plumbing stacks, and electrical wiring. Discovering these mechanical systems inside the wall during demolition is a common and significant complication. While electrical and plumbing can often be rerouted with relative ease, relocating large, rigid HVAC ducts that supply heat or air conditioning to the second floor presents a major logistical challenge that can impact your budget and your open-concept aesthetic.
Ignoring this issue is not an option. These ducts are essential to the comfort and function of your home. You must have a plan, developed with your contractor and engineer, for how and where they will be relocated. Attempting to improvise a solution mid-project leads to costly delays and poor compromises. There are generally three primary strategies for handling HVAC relocation, each with distinct pros, cons, and cost implications.
Your options typically include:
- Option 1: Reroute in a New Bulkhead. This is often the most economical solution. The ducts are rerouted along the new beam or ceiling and enclosed in a new drywall bulkhead. While functional, this compromises the clean, flat ceiling that is the primary goal of the renovation.
- Option 2: Install Flat In-Joist Ducts. It’s sometimes possible to use wider, flatter ducts that can be run within the spaces between the ceiling joists. This can preserve a flat ceiling but has limitations. These ducts may not provide adequate airflow for the second floor, potentially violating code requirements, and can sometimes be noisier than standard round ducts.
- Option 3: Upgrade to a Ductless System. The most expensive but often best-performing solution is to abandon the second-floor ducts entirely. You can cap them in the basement and install a modern, ductless mini-split heat pump system with heads in the upstairs bedrooms. This provides superior, zoned heating and cooling and guarantees a clean, open main floor ceiling.
The right choice depends on your budget, the specific layout of your home, and how much you prioritize a completely unobstructed ceiling. This decision should be made during the initial design phase, not after the wall has been opened up.
The Foundation Mistake That Can Collapse Your Row House During Excavation
The most critical—and most frequently underestimated—aspect of removing a main-floor load-bearing wall is how the new, concentrated loads are transferred to the foundation. The original wall distributed the weight of the house evenly along its entire length. A new beam, however, collects all that weight and transfers it to just two specific locations: the point loads at each end. If the structure beneath these points in your basement is not properly reinforced to handle this immense new pressure, the result can be catastrophic failure, including foundation cracking, severe sagging, or in the worst-case scenario for an attached row house, structural collapse.
This is not a theoretical risk. It is a fundamental principle of structural engineering. As one professional contractor with a University of Toronto engineering background states, the basement work is often a prerequisite to the main floor work. They explain:
There are times when prior to removing a load-bearing wall on the main floor, new concrete footings and columns need to be poured and installed in the basement – some other times the existing structural beam in the basement also needs to be reinforced prior to doing work on the main floor.
– Professional structural contractor, Safe Load-Bearing Wall Removal Experts
This means your project may require excavating sections of your basement floor to pour new, larger concrete footings directly beneath where the new beam will rest. A new steel support column (or “post”) is then installed on top of this footing to carry the point load from the beam down to the solid ground. Simply placing the new beam on an existing basement wall or an undersized column on the concrete slab is a recipe for disaster. The concrete slab itself has very little structural strength and will crack under such a concentrated load. Any reputable engineer’s plans will include detailed specifications for these new footings and support columns, and a municipal inspector will check to ensure this work is done correctly before any load is applied.
Why a Legal Retrofit Increases Your Property Value by Over $50,000?
An open-concept living space is one of the most sought-after features in the Toronto real estate market. A well-executed, legally permitted renovation can provide a significant return on investment. In fact, removing a load-bearing wall to create this desirable layout can enhance the aesthetic and functional value of a property by $75,000 to $150,000. However, the key words are “legally permitted.” The entire value-add hinges on your ability to prove to a potential buyer and their home inspector that the work was done correctly and to the standard of the Ontario Building Code. Without that proof, a savvy buyer will see your beautiful open space not as an asset, but as a massive, unquantified liability.
When you sell your home, you will be required to disclose any major renovations. If you did the work without a permit, you have two choices: lie on a legal document (exposing yourself to a lawsuit) or admit the work was unpermitted. Admitting it will trigger red flags for any informed buyer, who will likely demand a deep discount to cover the potential cost of rectifying the work or walk away from the deal entirely. They may even make their offer conditional on you obtaining a permit retroactively, which can be an expensive and uncertain process.
To secure the maximum increase in property value, you must treat your renovation documents as a critical asset. Your final renovation portfolio is the proof that translates your construction spending into real equity. This documentation provides indisputable evidence that the hidden structure behind the new, smooth drywall is safe and professionally engineered.
To maximize resale value, your documentation portfolio must include:
- Stamped Engineering Drawings: The original P.Eng-stamped drawings showing the design of the beam, columns, and footings.
- City of Toronto Building Permits: The official permit placard issued by the city before work began.
- Inspection Reports: A record of every passed inspection at each required milestone of the project.
- Final Closed Permit Certificate: The single most important document, proving the city has signed off on the completed work as compliant with the OBC.
- Renovation Portfolio: A collection of before-and-after photos that visually showcase the transformation.
Key Takeaways
- Engineer First, Always: No work, no contractor quotes, and no demolition should ever happen before you have a set of P.Eng-stamped drawings in hand.
- A Permit is Not Optional: A building permit is your primary shield against insurance invalidation, legal liability, and the erosion of your property’s resale value.
- Trace the Load Path to the Ground: The project’s success depends on reinforcing the structure all the way down to new, properly sized footings in the basement.
Which White Paint Color Increases Resale Value for Toronto Condos?
After the immense effort and technical precision of the structural work—the engineering, permits, beams, and foundation supports—the final step is what brings the new space to life: the finish. While it may seem trivial after such a complex undertaking, the choice of paint color is the final piece of the puzzle that maximizes your return on investment. The goal is to make your newly created open-concept main floor feel as large, bright, and welcoming as possible to the widest possible audience of potential buyers. In the competitive Toronto market, the right neutral white doesn’t just look clean; it creates a blank canvas that allows buyers to envision their own lives in the space.
However, not all whites are created equal. A stark, cold white can make a large, open space feel clinical and sterile. The key is to choose a white with subtle undertones that adds warmth and sophistication without appearing yellow or beige. According to Toronto design experts who track real estate market preferences, the most successful whites for a newly opened space are complex neutrals. They recommend avoiding pure, basic whites and opting for something with more depth. For a large, open main floor in a Toronto semi, top recommendations often include Benjamin Moore’s Cloud White (CC-40) or Sherwin-Williams’ Alabaster (SW 7008).
These specific shades are known for their ability to make a space feel cohesive and expansive. They reflect light beautifully while their soft, warm undertones prevent the starkness of a gallery wall, creating an atmosphere that is both modern and inviting. A professional-looking finish is what elevates the entire project from a DIY endeavor to a high-value renovation. Sealing trims properly and applying a consistent, high-quality coat of a proven neutral paint color is the final handshake that confirms the quality of the investment, both seen and unseen.
For a safe, compliant, and valuable renovation that transforms your Toronto home, the path is clear and non-negotiable. Your first step, before contacting any contractor, is to engage a qualified structural engineer to perform a detailed assessment and prepare professional drawings. This is the foundation of a successful project.